Total Pageviews

Tuesday 5 March 2013

HTML IN SIMPLE STEPS
PART-III
LINKS, IMAGES & MULTIMEDIA


CREATING HYPERLINK:

EG: <a href="www.google.com">Google</a>

OUTPUT:

SETTING HYPERLINK COLORS:

HTML provides 3 attributes viz. link, vlink,alink which can be used inside the <body> tag.

link specifies the color of the hyperlink that has not been visited before on the web page.
vlink specifies the color of the hyperlink that has been visited before on a web page.
alink specifies the color of currently active links.

EG:
<body link="green" vlink="red" alink="blue">
<a href="www.google.com">Google</a>

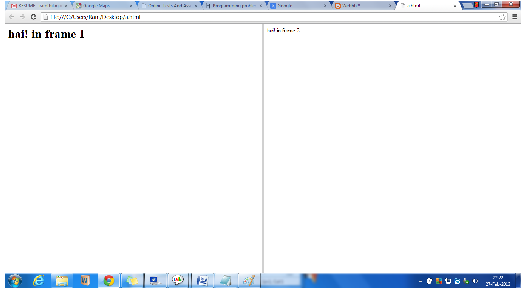
NAVIGATE TO DIFFERENT PLACES IN THE SAME PAGE:

EG: 


<body link='green' vlink="red" alink="blue">
<a href="#BOTTOM">bottom</a>
<br/><br/><br/><br/><br/><br/><br/><br/><br/><br/><br/><br/><br/><br/><br/><br/><br/><br/><br/><br/><br/><br/><br/><br/><br/><br/><br/><br/><br/><br/><br/><br/>
<hr>
<a name="BOTTOM"><h1>this is the bottom!</h1></a>
</body>

INSERTING AN IMAGE:

Use <img> tag and src attribute to insert an image in the web page.

EG:

<body>
<img src="D:\full blossom.jpg"></img>
</body>

OUTPUT:


ALTERNATE TEXT FOR THE PICTURE:

Alternate text appears when the mouse pointer is placed on the picture. To add an alternate text, use alt attribute in <img> tag. Sometimes the inserted image doesnot appear in the browser due to path error. In such case, alternate text helps in identifying what the picture is. Alternate text feature is also used to give a short description about the image. 

EG:
<body>
<img src="D:\full blossom.jpg" alt="flower"></img>
</body>

GIVING BORDER AND ALIGNING TO THE IMAGE:

border attribute is used in <img> tag to give border to the image. align attribute is used to align the image on the browser screen. Values for align attribute can be "left", "right" or "center".

EG:

<body>
<img src="D:\full blossom.jpg" alt="flower" border=4 align="left"></img>
</body>

OUTPUT:


USING IMAGE AS A LINK:

Similar to text hyperlink, images can also be used to redirect to other pages.

EG:

<body>
<a href="www.flower.com">
<img src="D:\full blossom.jpg"></img>
</a>
</body>


WORKING WITH MULTIMEDIA:
EMBEDDIND A SOUND:
An audio can be embedded in the browser using the <embed> tag. src attribute is used in the <embed> tag to specify the source file path.

EG:

<body>
<embed src="D:\brittania.mp3">
</body>

OUTPUT:


EMBEDDING A VIDEO:

It is exactly similar to embedding the audio.

EG:

<body>
<embed src="D:\gangnam style psy.mp4">
</body>

OUTPUT:


Some browsers does not support embedding. To handle those browsers <noembed> tag is used. In this tag a message can be specified which will be shown if the browser doesn't support embedding.

CREATING LINK TO AUDIO/VIDEO:

A hyperlink can be directed to an audio file or a video file.

EG:

<body>
<a href="D:\brittania.mp3">music!</a>
<a href="D:\gangnam style psy.mp4">gangnam style!</a>
</body>

USING <OBJECT> TAG:

HTML also provides the facility to insert various multimedia objects using a common object tag (<object>). <object> uses two attributes to give specification of the multimedia object. The first attribute is data which specifies the path of the multimedia object and the second attribute is type which specifies the type of multimedia object, such as audio, video.

EG:

<body>
<object data="D:\brittania.mp3" type="audio/mp3">
</body>


-----------------------------------END OF PART - III---------------------------------

PART - IV WILL BE PUBLISHED SHORTLY! :-)

Tuesday 26 February 2013


HTML IN SIMPLE STEPS!!!
PART - II
LISTS, TABLES AND FRAMES


UNORDERED LIST:

EG: <ul>
<li>A</li>
<li>B</li>
<li>C</li>
</ul>

OUTPUT:
  •   A
  •   B
  •  C

ORDERED LIST:

EG: <ol>
<li>a</li>
<li>b</li>
<li>c</li>
</ol>

OUTPUT:
  1.  a
  2.  b
  3.  c

CUSTOMISING LIST:

Use  type attributes with values like “disc”,”square”,”circle”
(i.e) <ul type=”square”>
For ordered list, use values like
1    -   default(1,2,3,…)
A   -   A,B,C,…
a   -   a,b,c,…
I   -    I,II,III,...
i   -   I,ii,iii,…
EG: <ol type=”i”>
Nested lists are also possible.

CREATING DEFINITION LIST:

Definition list is a list of terms and their corresponding definitions. <dl> tag is used for this purpose. We can create items in the list by using <dt> and <dd> tags.
<dt> to define the term. NO END TAG!
<dd> to give the term’s definition. NO END TAG!
EG: <body>
<h1>Here is the list</h1>
<dl>
<dt>
<h4>ravi</h4>
<dd>flat no. 111, abc street.

<dt>
<h4>harini</h4>
<dd>door no. 6, xyz street.
</dl>
</body>

OUTPUT:


TABLES:

<table> </table>   - to create table
<tr> </tr>   - add a row to the table
<th> </th>   - add column heading
<td> </td>   - add data to the table cell
<caption> </caption>   - to give table caption or heading
EG:
<body>
<table>
<caption><h2>STUDENT DETAILS</h2></caption>           <!--adding caption-->
<th>name</th>                                                      <!--table column name-->
<th>rollno</th>
<tr>                                                    <!--1st row of table-->
<td> Hari</td>                               <!--contents of 1st row-->
<td>10bc105</td>
</tr>

<tr>                                                    <!--similarly 2nd row-->
<td>sam</td>
<td>10bc089</td>
</tr>
</table>
</body>

OUTPUT:


TABLE BORDER:

By default, table border=0. Use border attribute in table tag and set values as 1,2,…
EG: <table border=”1”>

ALIGNING TABLE AND ITS CONTENTS:

Use align attribute in <table> tag or <th> tag or <td> tag to align the table or table heading or table data respectively towards left, right or centre.
EG:
<table align=”right”>
<th align=”centre”>
<tr>
<td align=”left”>abc</td>
</tr>
</table>

SETTING TABLE WIDTH AND COLUMN WIDTH:

Table width can be expressed as an absolute value in pixels or as a percentage of screen width. Use width parameter to alter the width in the required tag like <table> to change table width, <th> to change the column width.
EG:
<table width=90%>
or
<table width=500>
<th width=30%>

CHANGING TABLE BACKGROUND COLOR:

EG: <table bgcolor=”yellow”>
To change a cell color, use bgcolor inside <td> tag. This idea can be extended.

SETTING CELL PADDING AND CELL SPACING:

Cell padding is the space between the cell edge and the cell content. Its value can be set by using cellpadding attribute in <table> tag.
EG: <table cellpadding=10>
Cell spacing is the space between cell’s border. Its value can be set by using cellspacing attribute in <table> tag.
EG: <table cellspacing=3>

MERGING (OR) SPANNING ROW AND COLUMN:

Use rowspan attribute in <td> or <th> tags to merge two or more rows. Rowspan takes the value of no. of rows to be merged.
EG:
<body>
<table border=1width=80% bgcolor=”yellow”>
<caption><h2>STUDENT DETAILS</h2></caption>          
<th rowspan=3>student name<br>and rollno.</th>                    
<tr>                                                   
<td> Hari</td>                  
<td>10bc105</td>
</tr>

<tr>                                                   
<td>sam</td>
<td>10bc089</td>
</tr>
</table>
</body>

 OUTPUT:


Similarly, we can use colspan attribute to merge columns with its value as no. of columns to be merged.
EG: <th colspan=3>student name<br>and rollno.</th>

OUTPUT:


NESTED TABLE:

Table inside the table
EG:
<table>
<tr>
<td><table border=1 bgcolor=red>     <!--table inside 1st cell of the 1st row-->
<th>name</th>
<th>roll</th>
<tr>                                                   
<td> Hari</td>                  
<td>10bc105</td>
</tr>
<tr>                                                   
<td>sam</td>
<td>10bc089</td>
</tr>
</table></td>        <!--end of the table inside the 1st cell in 1st row-->

<td><table border=2 bgcolor=”yellow”>   <!--table inside 2nd cell of the 1st row-->
<th>city</th>
<tr>
<td>Coimbatore</td>
</tr>
<tr>
<td>Chennai</td>
</tr>
</table></td>          <!--end of the table inside the 2nd cell in 1st row-->
</tr>
</table>

OUTPUT:


WORKING WITH FRAMES:

It is possible to divide the browser window into various parts and view different html file outputs in each part. For doing this, frames are used. Frames are created using  <frameset> tag and <frame> tag inside <frameset> tag.
Vertical frames can be created by using the attribute cols with percentage as its value.

EG:

File1.html
<html>
<body>
<h1>hai! in frame 1</h1>
</body>
</html>

File2.html
<html>
<body>
hai! in frame 2
</body>
</html>

Main program:
<HTML>
<frameset cols=50%,50%>
<frame src="1.html">
<frame src="2.html">
</frameset>
</HTML>

OUTPUT:


Horizontal frames can be created by using the attribute rows with percentage as its value.
(i.e.) <frameset rows=50%,50%>

OUTPUT:


Combination of vertical and horizontal frames:

EG:

<frameset cols=50%,50%>

<frameset cols=50%,50%>
<frame src=1.html>
<frame src=2.html>
</frameset>

<frameset rows=50%,50%>
<frame src=1.html>
<frame src=2.html>
</frameset>

</frameset>

OUTPUT:


Frame borders are applied using frameborder attribute. Pass either “yes” or 1 (or) “no” or 0 as a value of the frame border attribute. Thickness of the frame border is set using framespaceing attribure of <frameset> tag.

EG:

<frameset cols=50%,50% frameborder=1 framespacing=10>

HYPERLINK:

It is used to create link between the web pages. Hyperlink takes a reference of the webpage using the href attribute of the anchor tag <a>.  To specify the target location of the webpage, use target attribute in <a> tag.

EG:

run.html
<HTML>
<frameset cols=25%,75%>
<frame src=main.html>
<frame src=def.html name=display>
</frameset>
</HTML>

main.html
<html>
<body>
<a href=1.html target=display>page 1</a>
<a href=2.html target=display>page 2</a>
</body>
</html>

def.html
<HTML>
<body>click it!!! </body>
</HTML>

1.html
<html>
<body>
hai in page 1
</body>
</html>

2.html
<html>
<body>
hai! in page 2
</body>
</html>

OUTPUT:


-----------------------------------END OF PART - II ------------------------------

PART - III WILL BE PUBLISHED SHORTLY! :-)


Monday 25 February 2013

HTML IN SIMPLE STEPS!!!
PART - I
GETTING STARTED &
WORKING WITH TEXT


STRUCTURE:
<HTML>
<HEAD>
<TITLE>
Title to be displayed in title bar of the web browser
</TITLE>
</HEAD>
<BODY>
Contents of the web page
</BODY>
</HTML>

TO CHANGE BACKGROUND:
<BODY bgcolor=”yellow”>
</BODY>

ADDING BACKGROUND PICTURE:
<BODY background=”C:\Documents and Settings\image.jpg”>
</BODY>

ADDING PLAIN TEXT:
<BODY>
This is the text…
</BODY>

LINE BREAK:
<br> tag is used. It DOESN’T HAVE CLOSING TAG </br>

CREATING HEADINGS: (no need of end tag)
<h1>hai</h1>                                 hai
<h2>hai</h2>                             hai
<h6>hai</h6>                                 hai

CREATING PARAGRAPH:
<P>this is para 1</P>
<P>this is para 2.
Welcome!!! J</P>

ALIGNMENTS:
<align=left>
<align=right>
<align=center>

CREATING HORIZONTAL RULE:
<hr>   NO END TAG!
---------------------------------------------------------------------------------------------
<hr align=”right” width=”50%”>
                                                     -------------------------------------------------
<hr align=”center” size=”20”>


CREATING SUBSCRIPT:
<sub>text</sub>

CREATING SUPERSCRIPT:
<sup>text</sup>

TEXT ALIGNMENT:
<h3 align=”center”>hai

BOLD, ITALIC AND UNDERLINE:
<B>ABC</B>
<I>ABC</I>
<U>ABC</U>

FONT:
<FONT SIZE=”4” FACE=”VERDANA” COLOR=”RED”>hello world!</FONT>

GROUPING TEXT AS BLOCKS:
We can define a section of the web page and give that section a different style with the heop of the <div> tag. This tag places a line break before and after the <div> elements.
EG:
<body>
Hai
<div style=”color:red”>
<h4>hello</h4>
<p>how are you? ;-)</p>
</div>
The div formatting style is not applied in this line!
</body>

<span>
We can use <span> tag to apply styles to the text in the middle of other texts.
EG:
<body>
<p>
<h1>hai.
<span style=”color:red”>
This text should be in diff. line
</span>
This text is grouped.
</p>
<p>
<span style=”color:yellow”>
This text comes in different paragraph.
</span>
</p>
</body>

INDENTING QUOTATIONS:
<BLOCKQUOTE> - We don’t need to set margins on the web page. Use blockquote for multiline quotations and <Q> for shorter quotations like one-line quotations.

SCROLLING TEXTS:
<marquee> - helps in displaying scrolling text.
EG:
<body>
<marquee loop=”infinite” bgcolor=”yellow” width=”300”>
This is the default way
</marquee>
<marquee loop=”20” bgcolor=”red” width=”15” direction=”up”>
This is an example of text scrolling upwards.
</marquee>
</body>

WORKING WITH CHARACTER ENTITIES:
To display some special characters in web browser, character entities must be inserted in the HTML code.


Entity name
desc.
Result
entity number
&nbsp;
non-breaking space

&#160;
&lt
less than
< 
&#60;
&gt
greater than
> 
&#62;
&amp
ampersand
&
&#38;
&quot
quotation
&#34;

         
EG:
This &nbsp;  &nbsp;  is the &lt; (less than) sign
OUTPUT:
This         is the < (less than) sign

COMMENTS:
<!-- This is a comment -->

---------------------------------------------END OF PART - I-----------------------------------------------
CONTINUE WITH  PART - II  FOR THE NEXT CONCEPTS...